 Retainer.shop
Check Your Dental Impression
Check your dental impression
Taking your impression at home is straightforward when you follow the steps carefully. Use this guide while taking your impression, then compare the finished result before you post it back to us.
How to take a great dental impression
Read through all the steps before you mix the putty. Once Part A and Part B are combined, you need to work promptly.
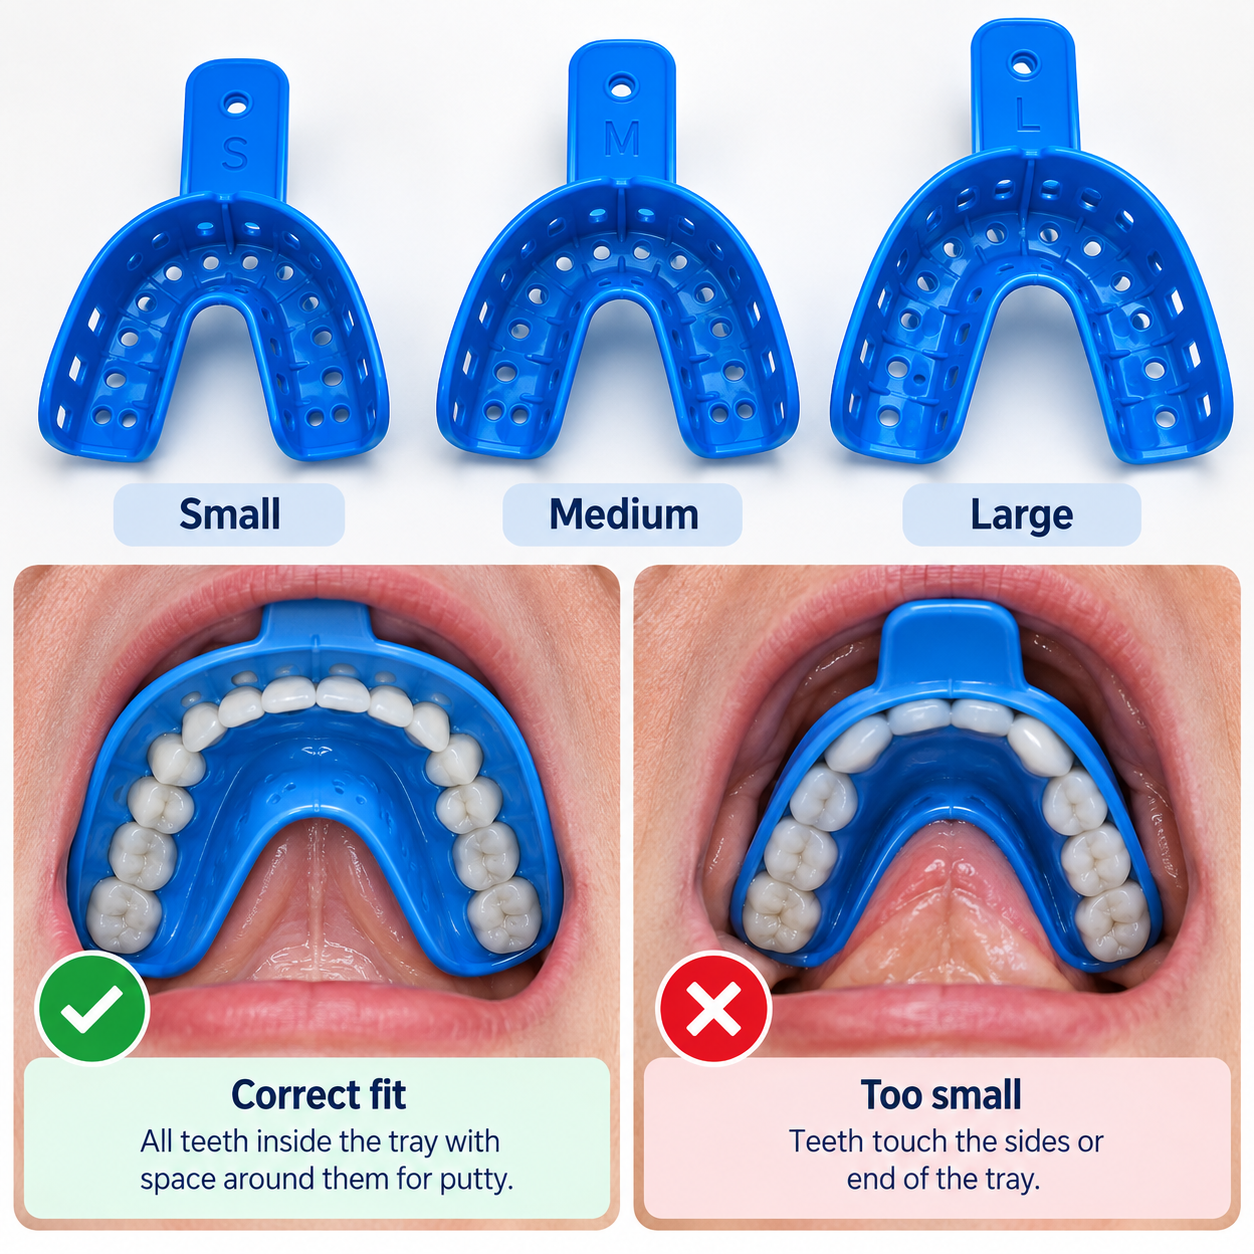
Choose the correct tray
Your kit contains Small, Medium and Large trays. Try them before mixing the putty. Choose one that comfortably contains the complete dental arch, including the back teeth, with enough room around the teeth for impression material.
The teeth should not press tightly against the sides or ends of the tray.
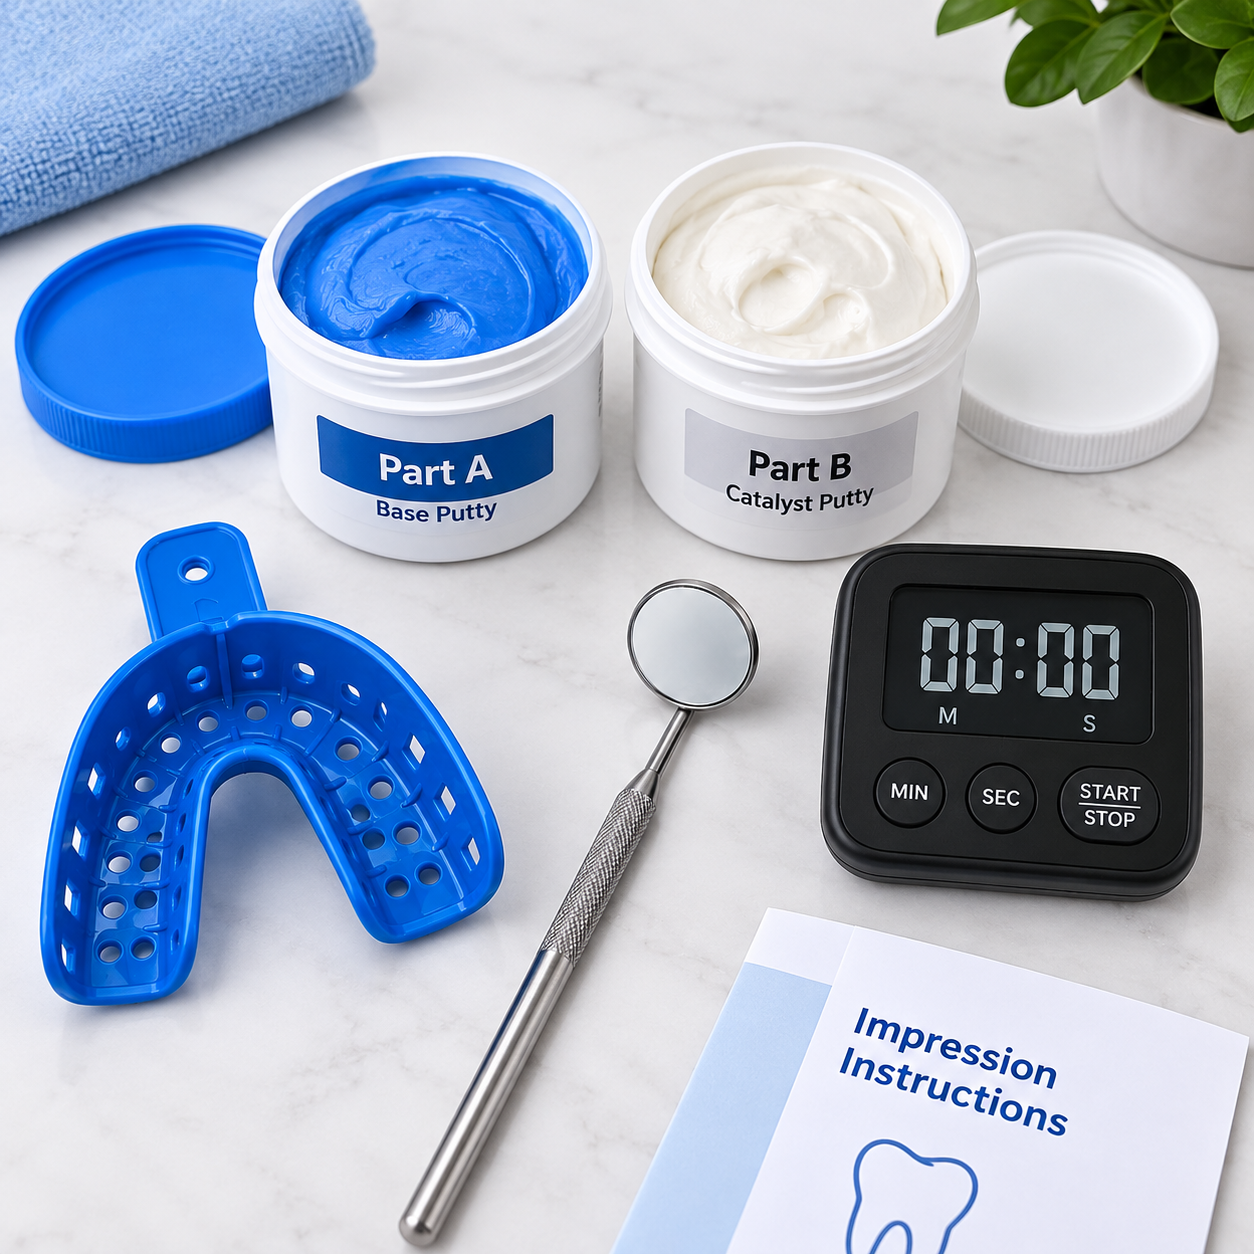
Prepare everything first
Have your selected tray, Part A putty, Part B putty, a mirror, a timer and these instructions ready.
Once Part A and Part B are combined, timing becomes important.
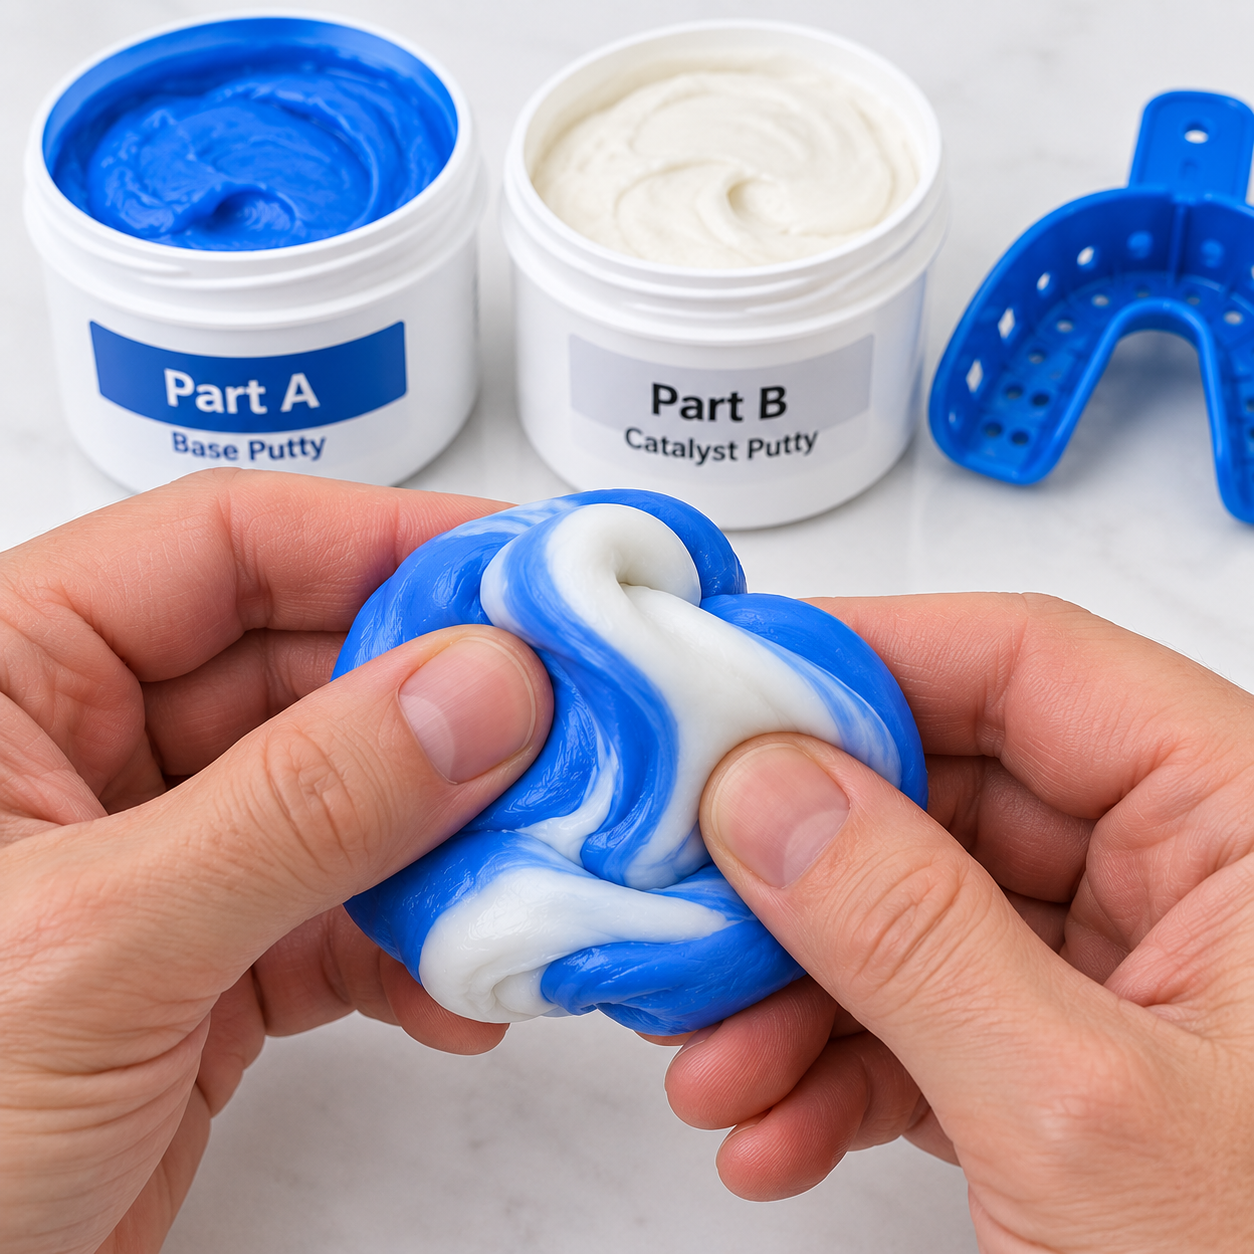
Mix the PVS putty
Mix the supplied Part A and Part B PVS putty together thoroughly for 25 seconds. Knead and fold them together quickly and thoroughly.
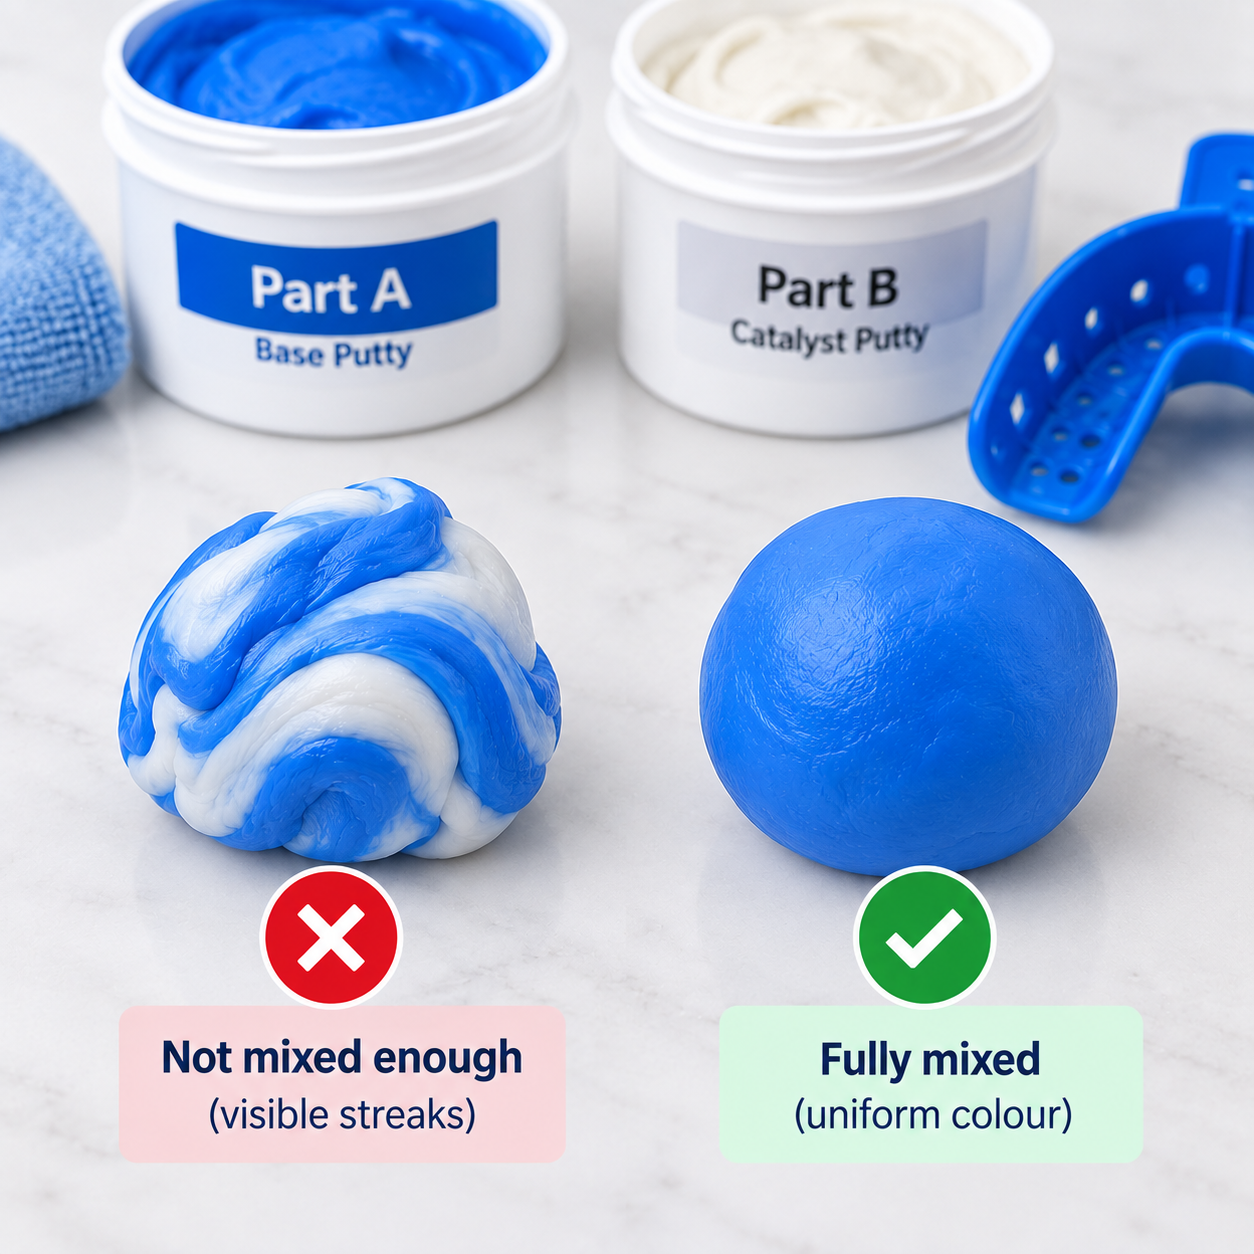
Check for one uniform colour
The mixed putty should be one uniform colour with no visible streaks.
Do not proceed with obviously incompletely mixed material.
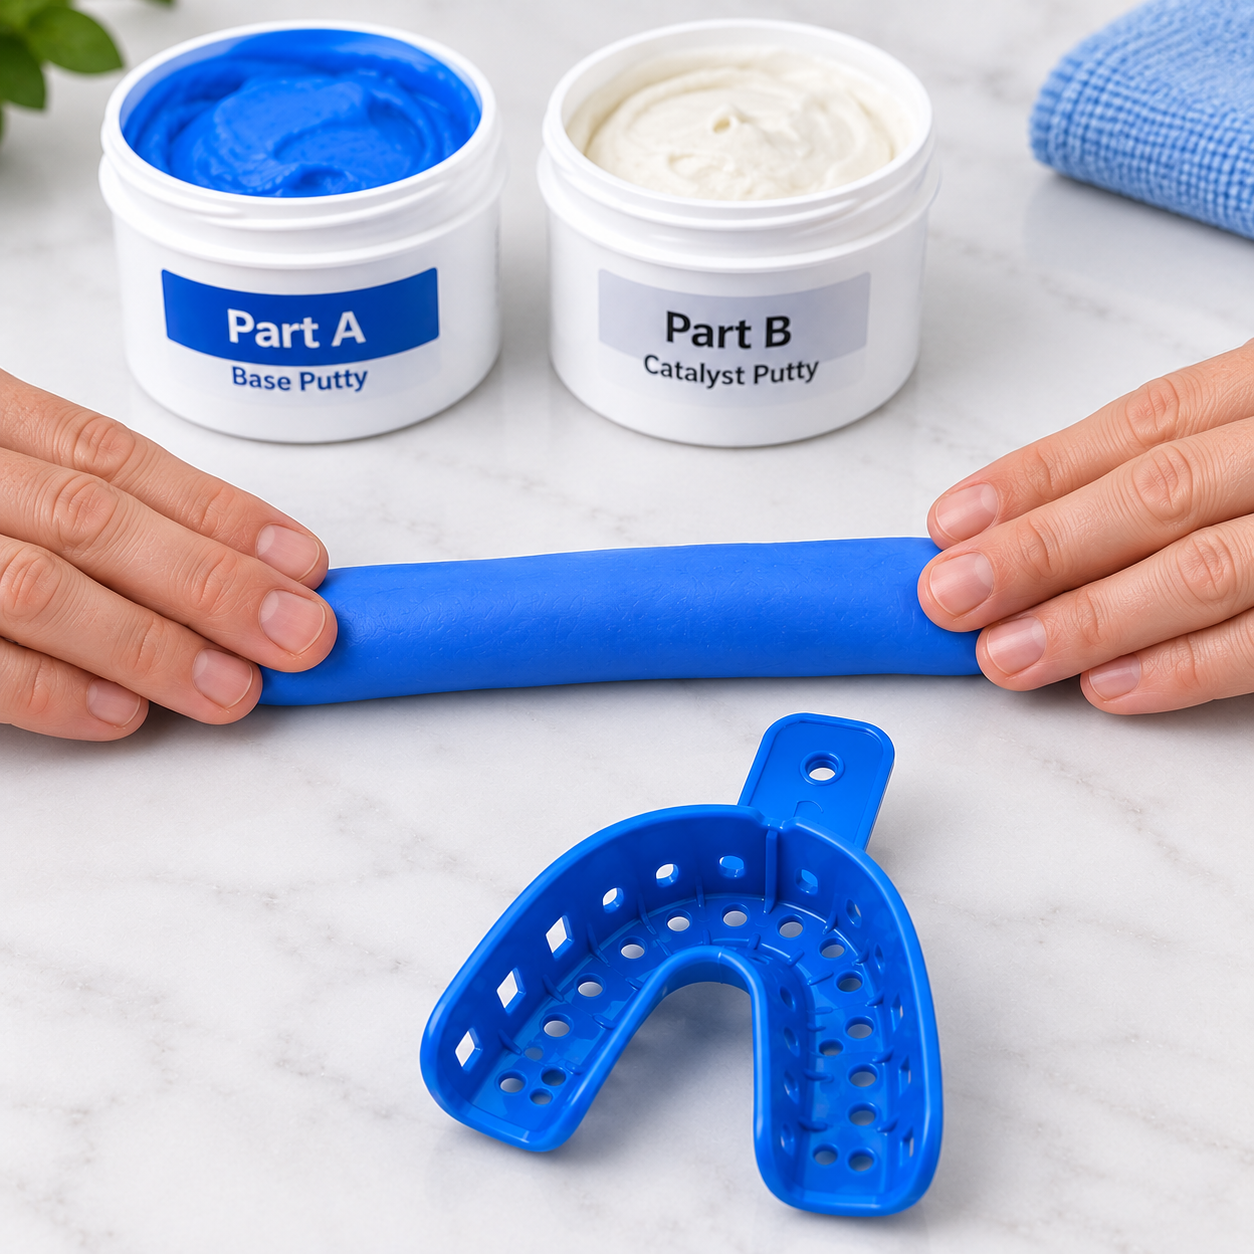
Roll an even sausage
Roll the mixed PVS into a smooth, even sausage long enough to run around the whole impression tray from one back end to the other.
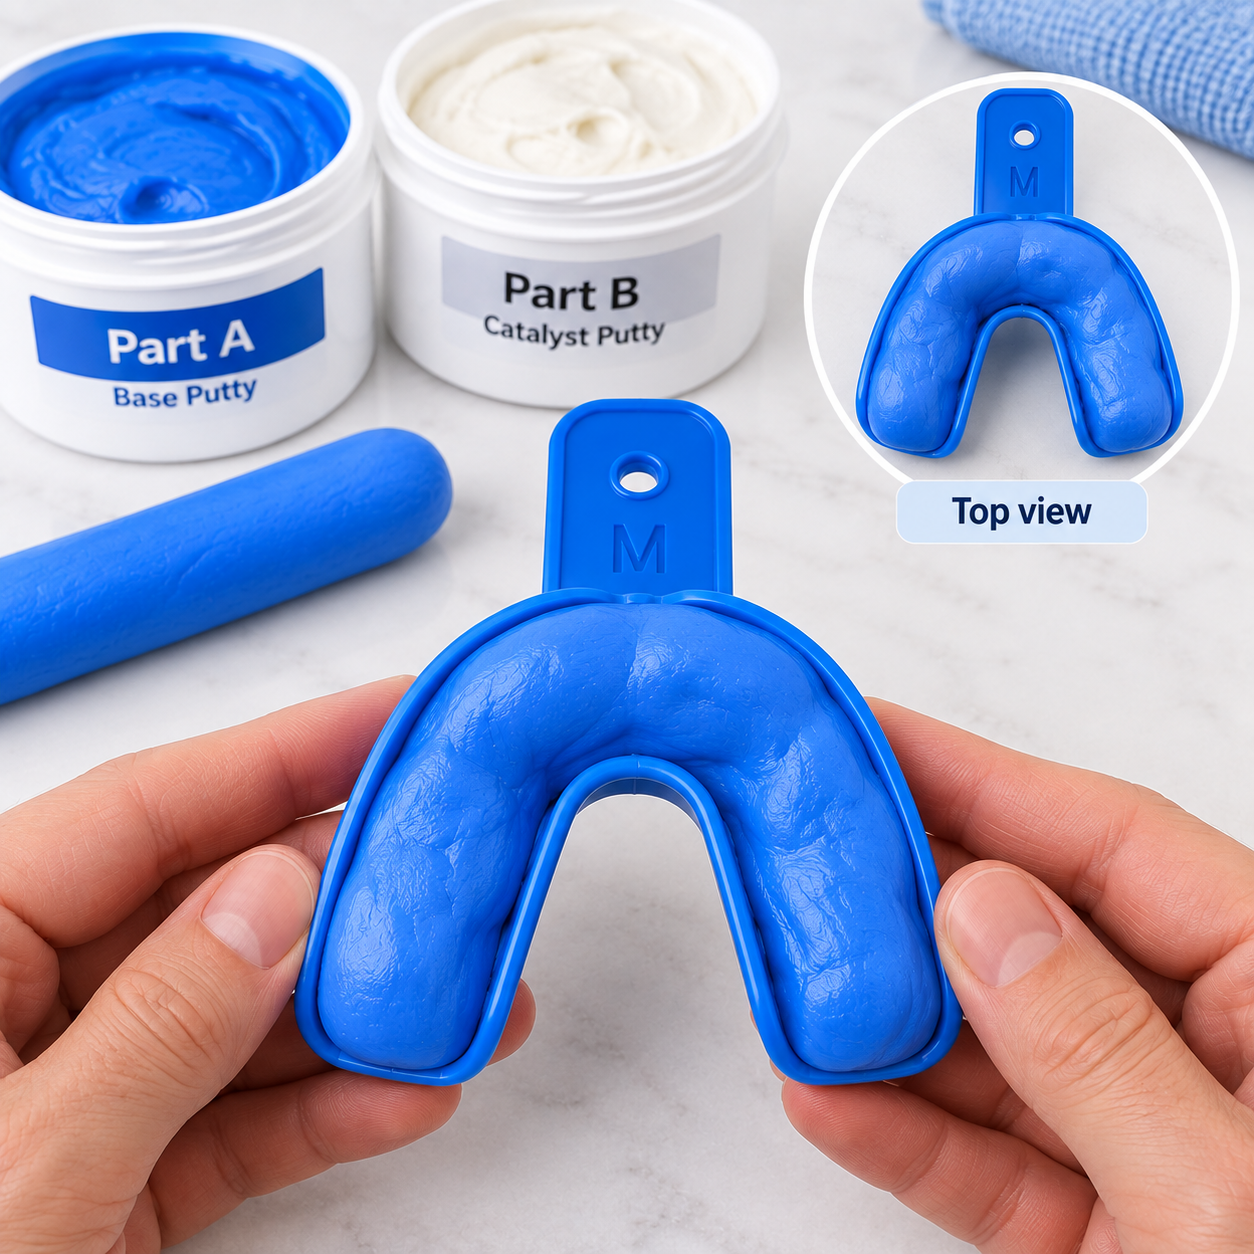
Load the tray
Place the putty continuously around the complete tray, including both back sections. Keep a good, even depth of material with no obvious gaps.
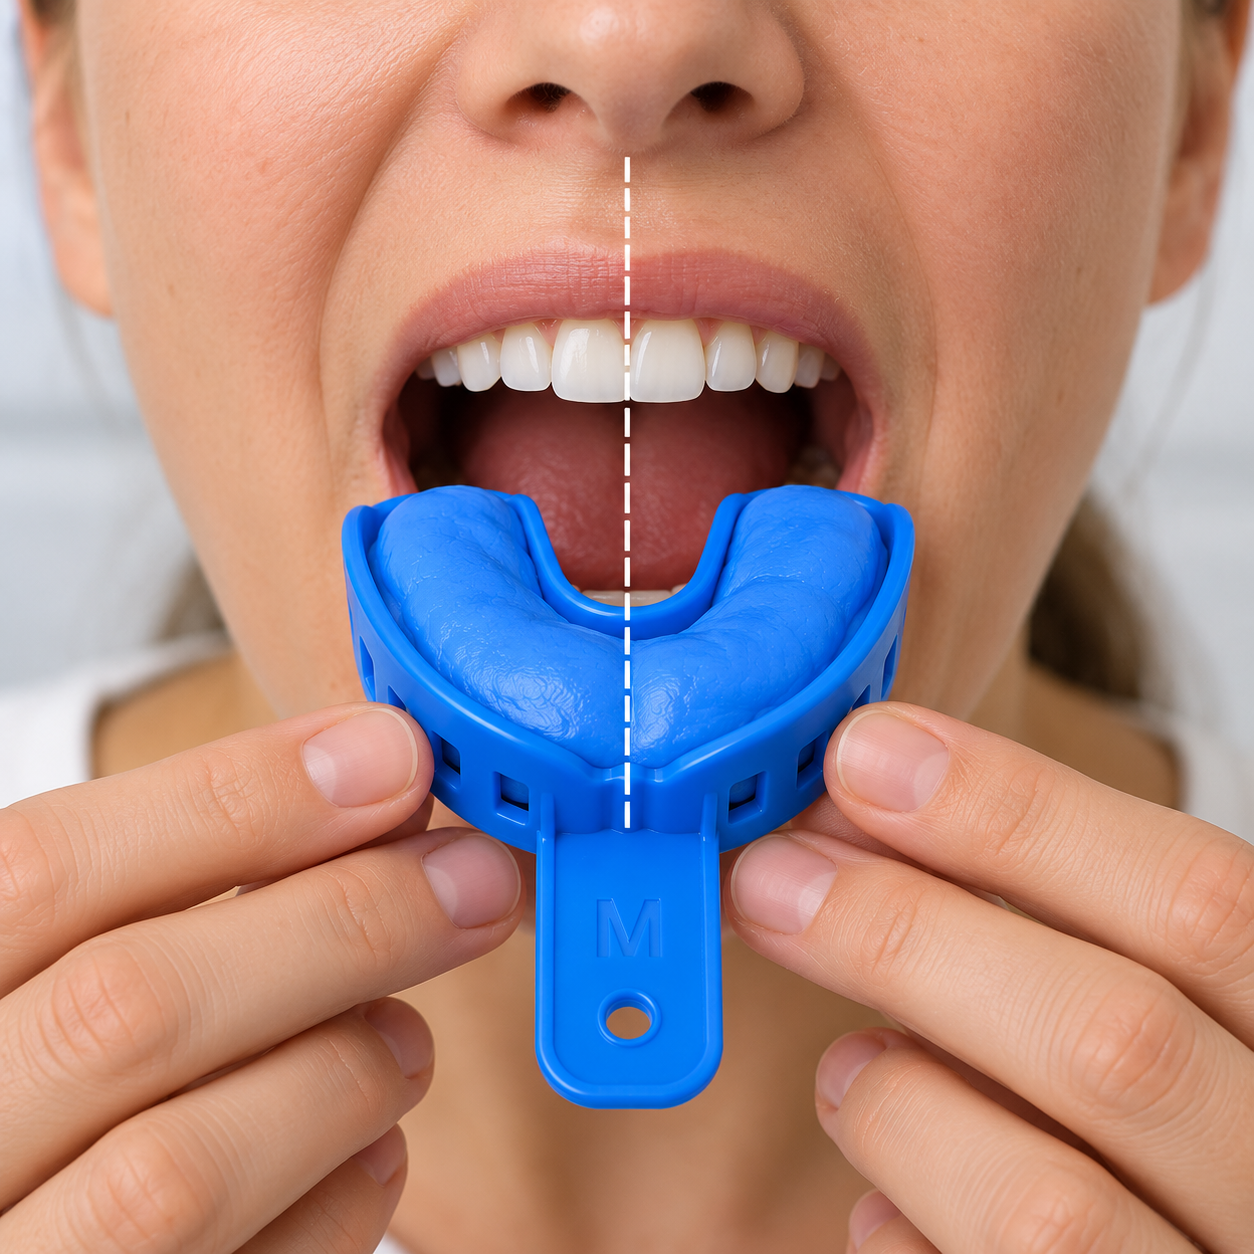
Centre the tray
Use a mirror and line the tray up centrally with the teeth before seating it.
Get it centred before the teeth enter the putty.
Avoid removing and repositioning the tray after seating.
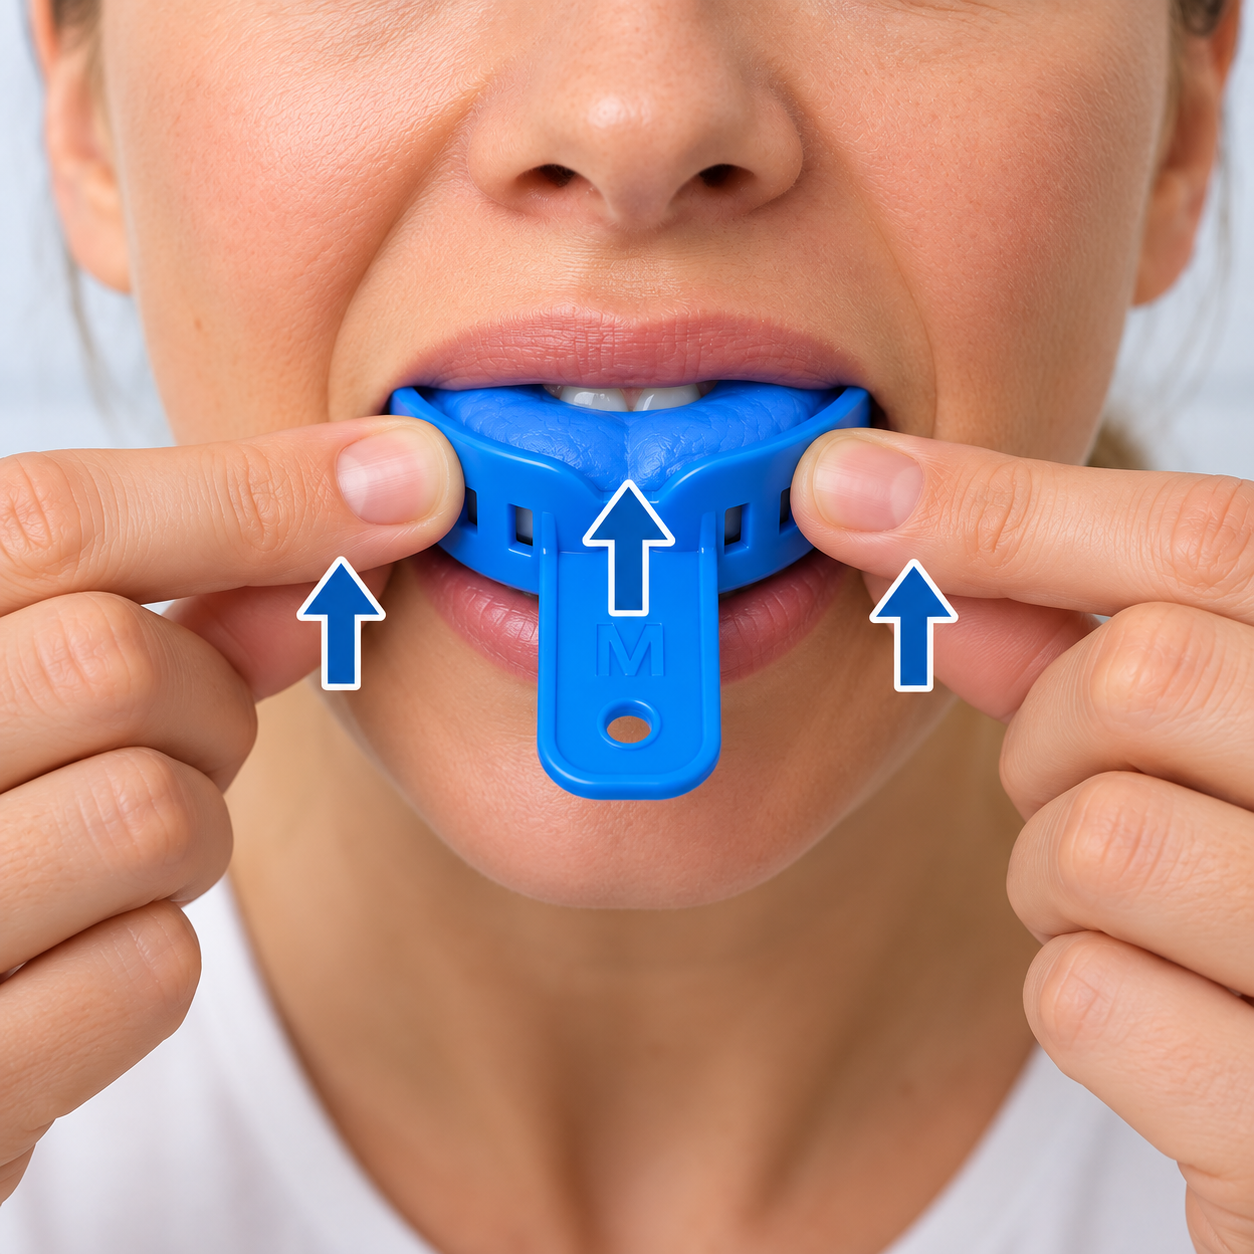
Seat it evenly
Press the tray evenly over the teeth using controlled finger pressure. For an upper impression, seat evenly upwards. For a lower impression, seat evenly downwards.
- Do not push one side in first.
- Do not rock the tray into position.
- Do not bite the tray into place.
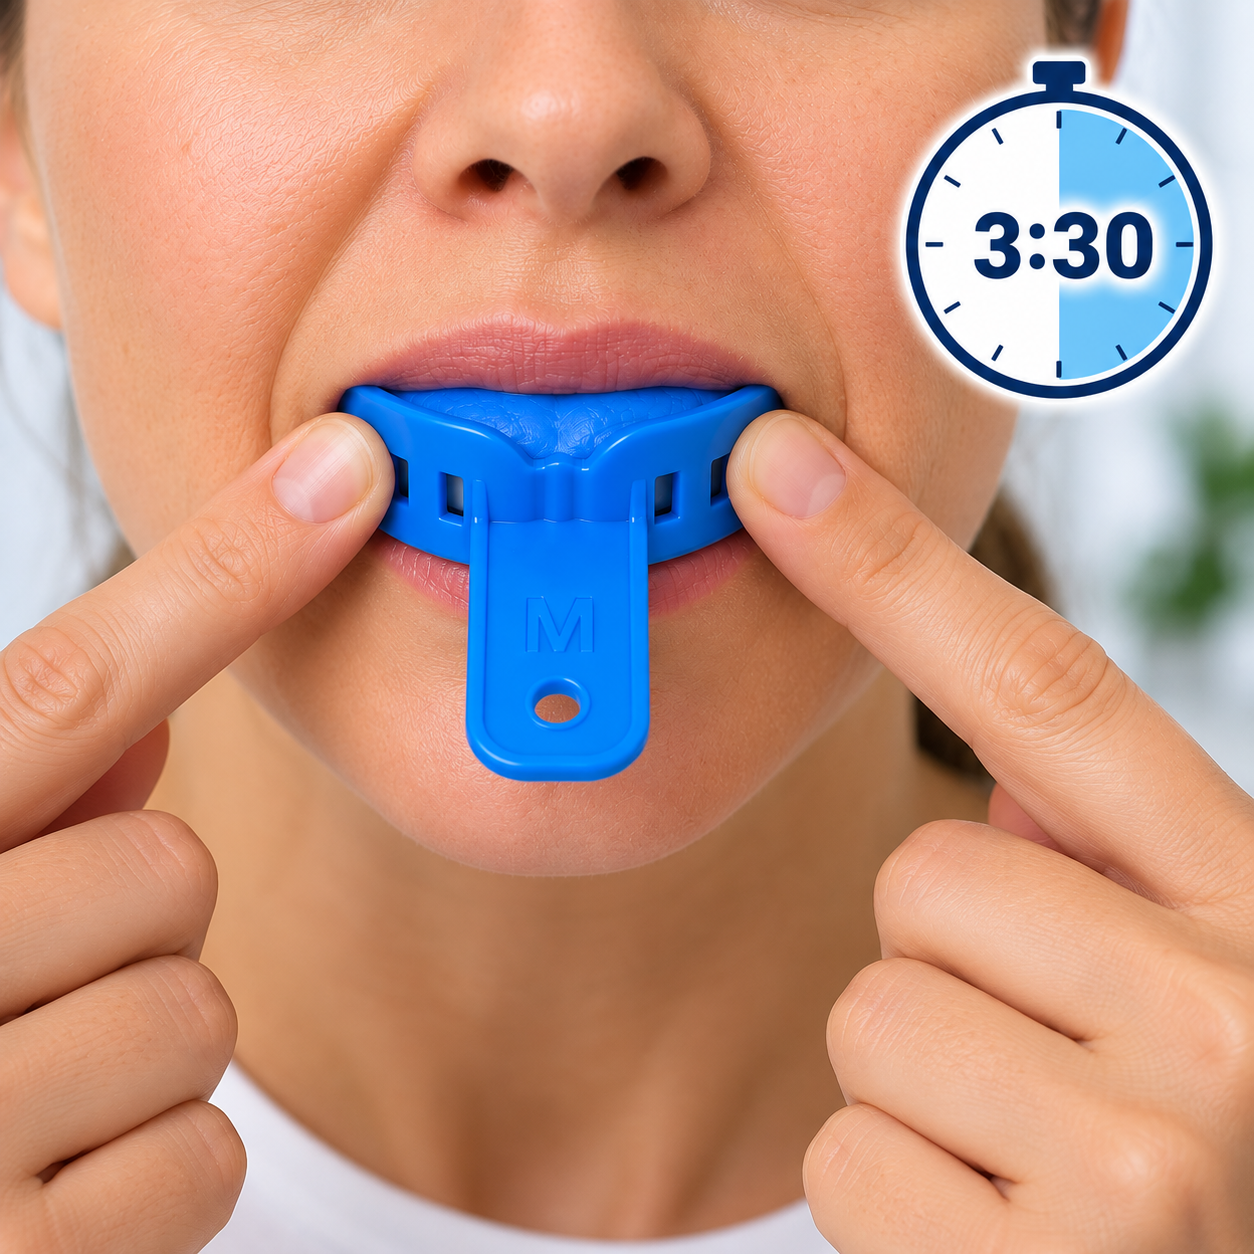
Hold the tray completely still
Hold the tray firmly in position with your fingers. Do not bite, talk, wiggle, rock or reposition the tray while the putty sets.
Start the 3:30 timer only after the tray is seated. This is the required in-mouth setting period for our supplied kit.
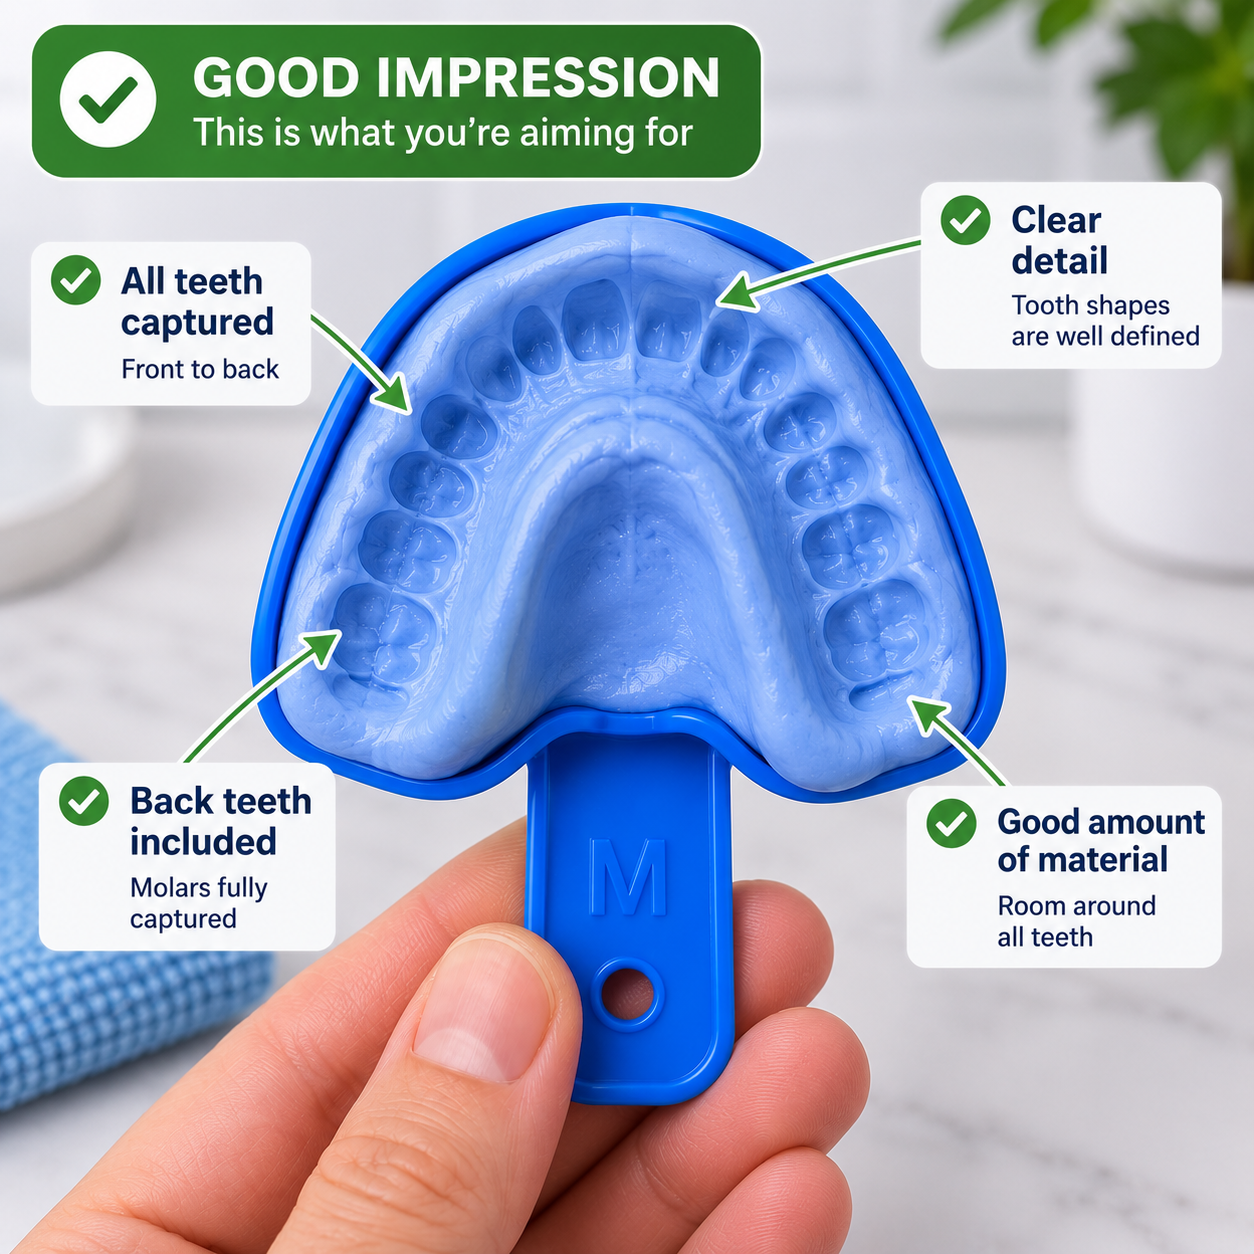
Remove and check
Once the full setting time has elapsed, carefully release and remove the tray. Avoid prolonged side-to-side rocking.
Leave the impression securely in the tray. Do not remove the PVS impression from the tray.
Now check your impression before you post it
Compare your impression with the examples below. A good impression should capture the complete arch, including the back teeth, with clear tooth detail and enough material around the teeth.
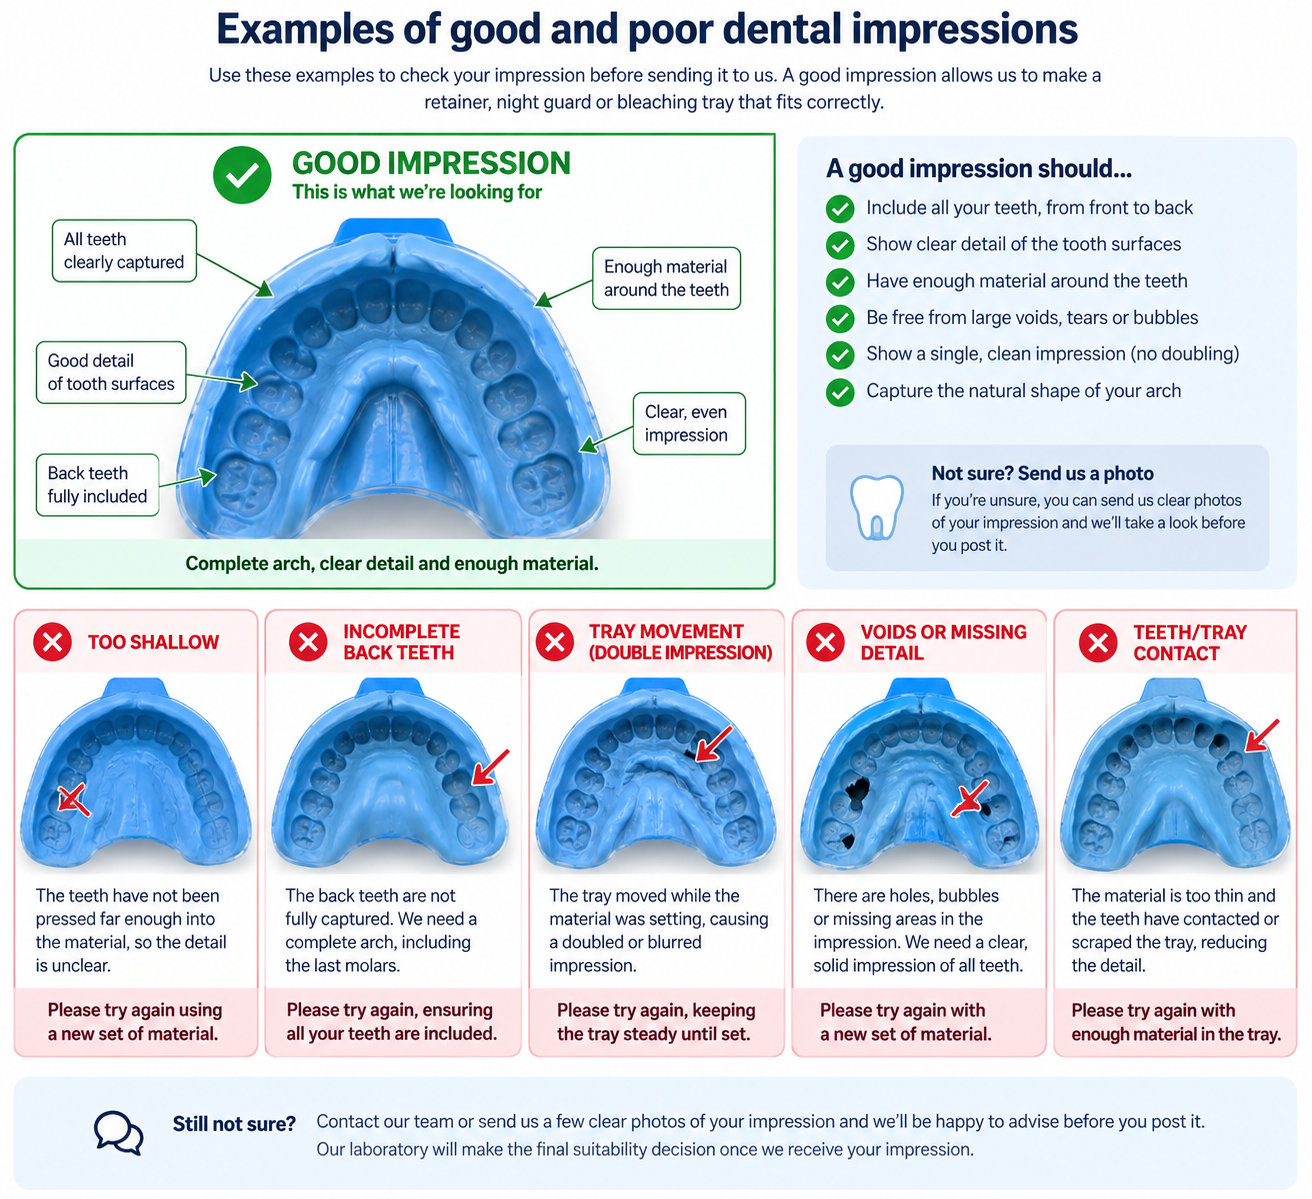
Quick impression check
Answer all five questions. This check is guidance only and is not a clinical diagnosis or final approval.
Still not sure? Send us a few photos.
Before you post your impression back, send us 2–3 clear photos from different angles and our team can take a look.
Please include your name and order number.
We can identify many obvious problems from photographs, but a photo check is preliminary. Final suitability is confirmed by our laboratory once we receive the physical impression.
One further attempt is included.
If the first impression is unsuitable, we provide one further attempt free. If more materials are needed after that, we explain the options and charges before you order.
An unsuitable impression can delay manufacture. We start manufacture after receiving a suitable impression.
This guide supports the instructions in your kit. It does not replace them or provide a diagnosis. Our laboratory makes the final suitability decision.
Ready to return your impression?
Keep the impression securely in its tray, package it as shown in the instructions supplied with your kit and use the supplied return label. If you have any doubt, contact us before posting.